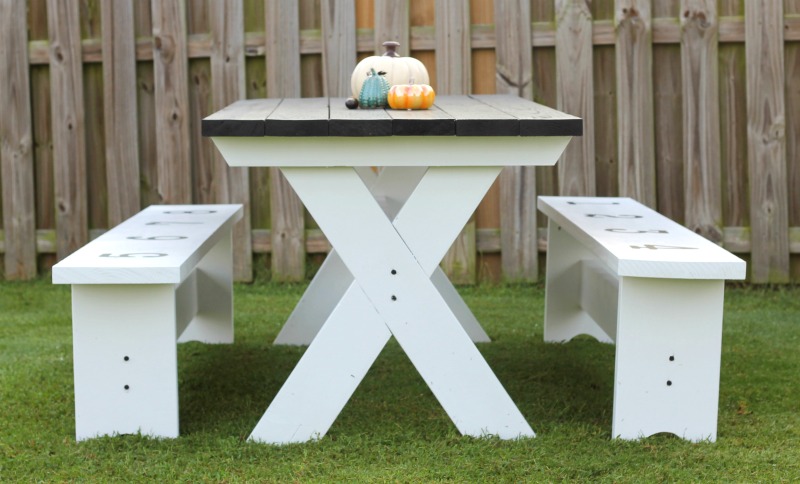
Hosting family and friends at your home, whether it’s for a backyard BBQ or holiday party, is always a blast. But sometimes, ensuring everyone has a place to sit can be a challenge. Add plenty of additional seating by learning how to build a picnic table.
A farmhouse table will look amazing on your deck, patio, or even on the grass. This table will boast seating for up to eight people. You won’t need to use a storage unit to stow away extra seating as this table look stunning as outdoor decor.
For this project, you will need:
- Exterior screws (1 ¼ inch and 2 ½ inches)
- 4–inch TimberLok screws (black)
- (11) 2x6x8 boards
- (2) 2x12x8 boards
- (1) 2x10x8 board
- Tape measure
- Table saw
- Jigsaw
- Circular saw
- Wood glue
- Chisel
- Drill
- Hand sander and sandpaper
- Wood stain and polyurethane combo in Classic Black
- Rag
- Plastic gloves
- Drop cloth
- Painters tape
- White outdoor paint
- Roller paint brush
- Vinyl numbers or number stencils (optional)
Remember to wear eye and eye protection as you work, and be cautious when using power tools.
How much does it cost to build a picnic table?
If you follow the same sizing outlined in the steps, it will cost between $200–$250 to build a DIY picnic table. For the size, the cost is rather affordable and can be enjoyed for years to come. The price may vary slightly depending on the size you need and the paint you choose.
What is the best wood to use for a picnic table?
For an outdoor table, pressure-treated boards are a good choice as the lumber is durable, easy to stain, durable, and low-cost. Hardwood is another popular option. Depending on your budget, you can splurge for cedar or cypress boards.
Related Article: How to Build a DIY Wooden Crate for Extra Storage at Home
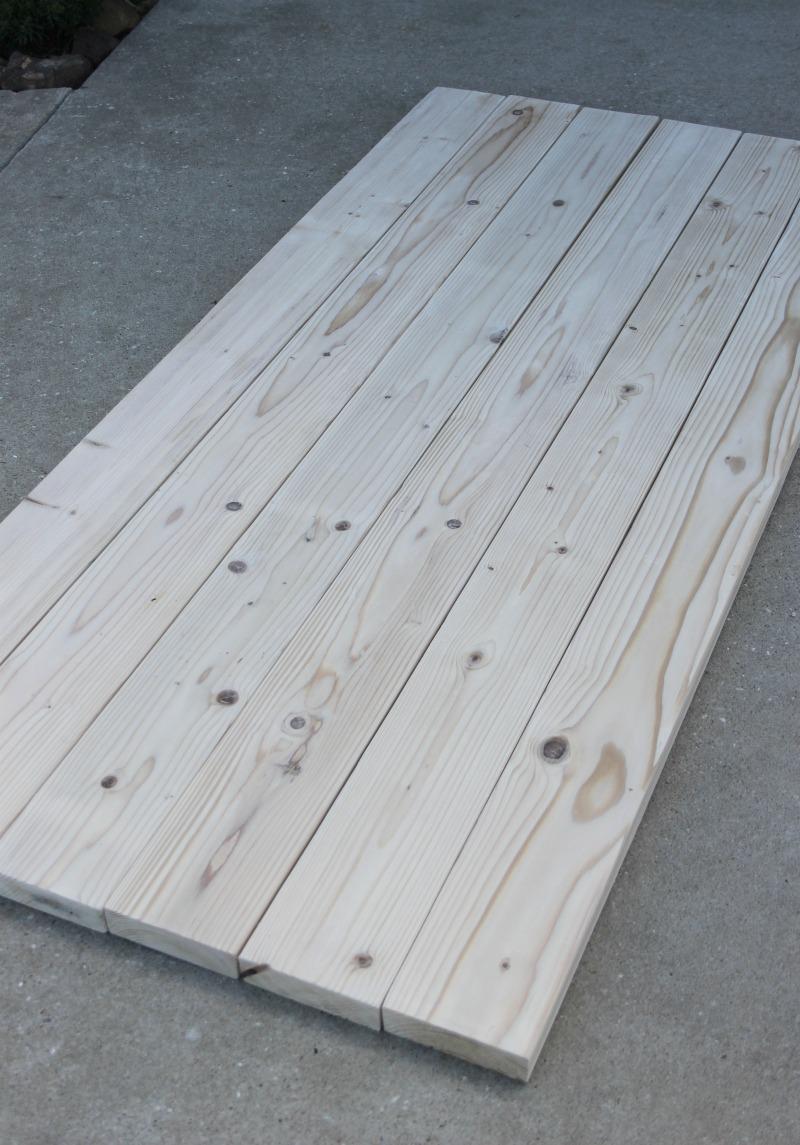
Step 1: Build the Tabletop
For this project, we’ll be creating a 6-foot table. Sand all your wood pieces before assembling, paying special attention to the top of the table. It should be nice and smooth. Cut six 2×6 boards to 6 feet long and lay them out on the ground.
You can customize the size of your farmhouse table as desired. Simply adjust the measurements to suit your needs.
PRO TIP: Be extremely careful when picking out your lumber for this project. You don’t want warped boards, huge knots, or boards with splits. Dig through the lumber to search for the best pieces.
Step 2: Stain Your Tabletop
It’s best to stain the top of your table before putting all the pieces together. Stain each of my boards separately. We recommend wearing rubber gloves, using an old rag and rubbing the stain into the board. Use two coats of stains for the boards and let them dry for 6 hours between coats.
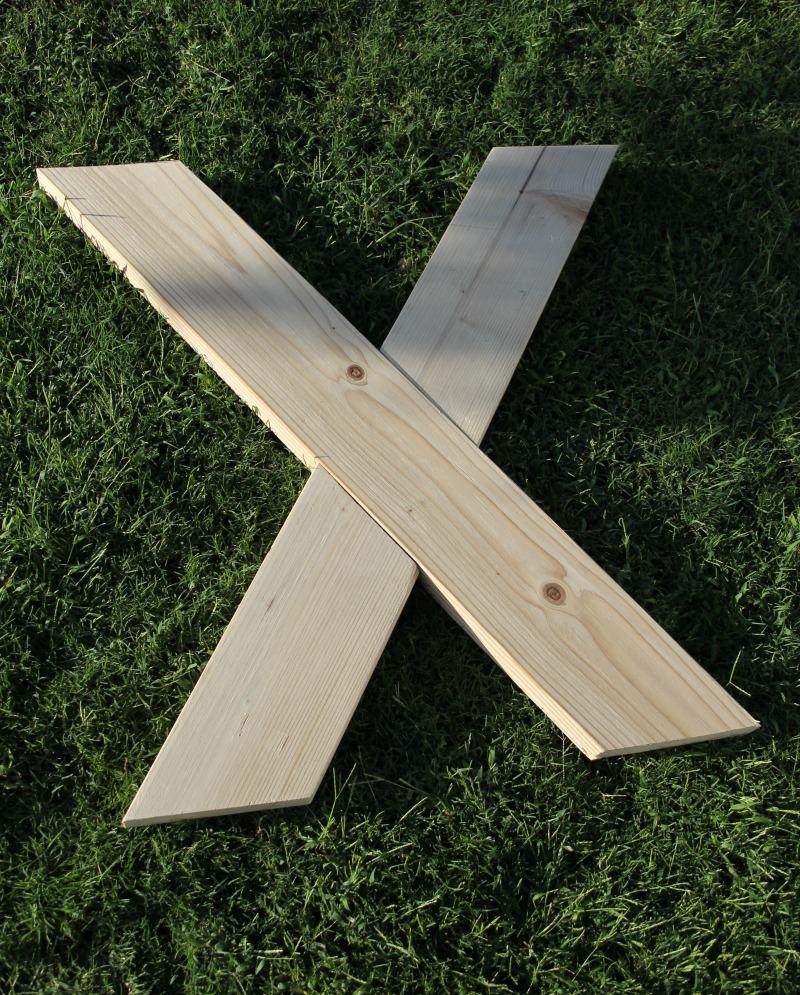
Step 3: Build Your Table Legs
While waiting for the stain to dry, you can start building the legs. The legs are the only tricky part of this whole project. The legs are made from a 2×6 board and cut to 31 ½ inches long. You’ll need four of these cut-out. On the ends of your boards, cut them all to a 32° angle.
Lay your boards across each other and mark where they overlap with a pencil. Use a hand saw to cut shallow grooves and a chisel to remove the wood. Essentially, you’re cutting out two spots to allow the leg pieces to fit perfectly.
Then, glue the legs together with wood glue. Once that dries, the bond will be permanent.
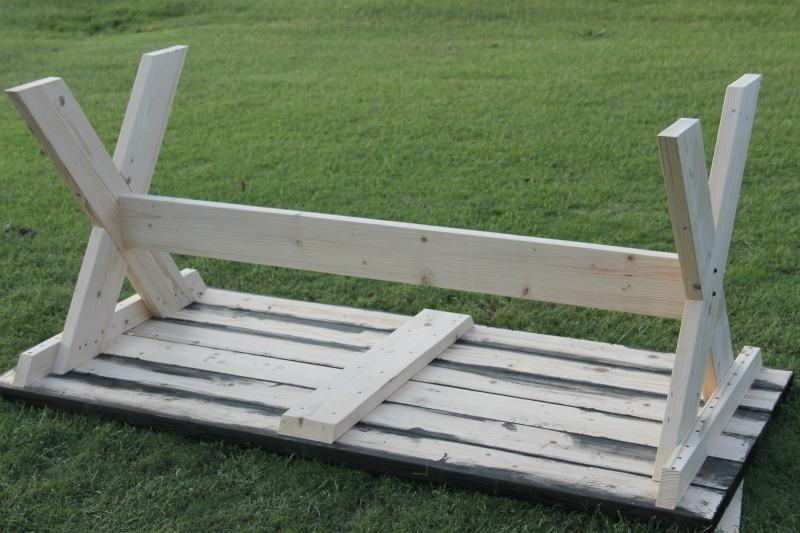
Step 4: Attach Your Table Braces and Legs
Next, you’ll make three table braces. Two of the three will go on each end. To make these two, cut a 2×6 board in half and trim them to 32 inches long. Angle the ends to 32° angles. For the middle brace piece, cut a 2×6 board to 32 inches long with angled ends.
Lay your tabletop on the ground, have one person hold the boards together securely, and have another person attach the braces with a drill and wood screws. Attach the two end braces first, then attach your middle brace. Use two screws per tabletop slat.
You may have to predrill holes and use a drill bit extended to get the screws into the tabletop for the two end pieces. Next, to attach the legs, screw them into the table braces on either end with wood screws.
Step 5: Attach Your Long Brace Piece
The brace piece that runs between the two leg pieces is a 2×6 board cut to 5 feet in length. Place this piece as close to the middle of the X as possible and screw in using the 4–inch TimberLok screws. Have one person hold the board up while the other person screws it in with a drill.
PRO TIP: Because you’ll be able to see the screws on top of the table, we suggest TimberLok because they have a decorative black head. This looks much prettier than a plain old screw.
Related Article: Simple DIY Farmhouse Bench Tutorial With Storage
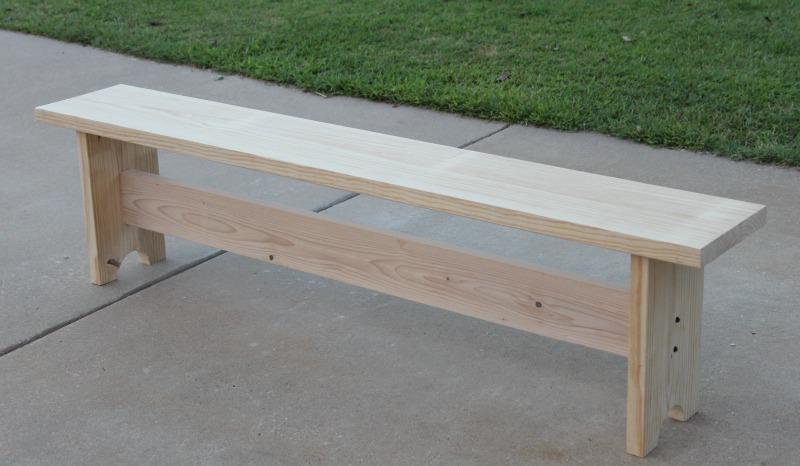
Step 6: Build Your Benches
For the legs of the bench, use a 2×10 board cut to 16 ½ inches. You’ll need 4 of these cut-out. If you want to make it a little fancier, cut a half circle out of the bottom with a jigsaw.
For the bench seat, use a 2×12 board cut to 6 feet long. You’ll need two of these. The two braces – one for each bench – are made out of a 2×6 board cut to 5 feet long pieces.
First, screw in your legs on both ends. Screw them in at an angle from the inside so no screw holes will be visible. Then, attach the brace the same way you did for the table using the 4–inch TimberLok screws.
PRO TIP: Use a scrap piece of a 2×6 board to hold it in place as you screw it in. This makes it easy to attach it in the same exact spot on both sides. You can also use scrap pieces of lumber to hold the bench off the ground as you work so your benchtop doesn’t get scratched.
Step 7: Paint Your Table Legs and Benches
You can paint your legs or benches whichever color you’d like. Whitewood picnic tables are a popular farmhouse style, so that would be a good option if that’s the look you’re going for.
You can choose to stain or paint the table, but you want to do either one. Leaving your table as-is could result in damage over time. Use exterior stain or paint to keep your table protected from the elements.
Step 8: Add Numbers to the Benches
One of the hallmarks of farmhouse style is numbers, so you can choose to add black vinyl numbers to both your benches. You can cut your own vinyl using a digital craft cutter, use stencils and paint, or order vinyl lettering online. Black lettering works well as it ties nicely into the exposed black screws on the tabletop.
How long will a picnic table last outside?
If you properly care for your picnic table by keeping it clean and staining it, you can get up to 10 years out of it. Around that time, the boards may need to be replaced due to weather damage or warping.
Now, you have a lovely seating area to entertain guests. The picnic table and benches will prove useful for years to come as you make lasting memories with those close to you.
This post originally appeared on the Life Storage Blog on 9/26/16 and was revised on 6/30/23 to provide new information.
