A fun DIY project is always a great weekend activity. And what better resource to use than free, accessible wood pallets? Whether you’re looking to save money on some new furniture or trying to take a more environmentally friendly approach to your home improvement projects, wood pallets are the perfect versatile and cost-effective solution.
In this article, we’ll guide you through a tutorial for a DIY pallet headboard that you can spruce up to fit any aesthetic. Paint it your favorite color or create the twinkling fairy light headboard of your dreams— the choice is yours!
How to Make an Easy DIY Pallet Headboard
Here are step-by-step instructions for how to make a simple pallet headboard. First, gather your supplies.
Things you’ll need to make a pallet headboard :
- Pallets (I used a total of four)
- Five 2×4 boards and one 2×6 board
- Reciprocating saw
- Hand sander and sandpaper (Preferably 60 grain)
- Paint or stain of your choice (I chose white, low-gloss)
- Miter saw
- Wood screws
- Trim nailer gun
- Measuring tape
Step 1: Gather Your Pallets

For this specific project, I used four total pallets. Depending on the size you’d like to make your headboard, you may want to pick up a few more (or a few less). A tip of advice: I purposely selected pallets of several shades— some light and some dark— so that the headboard would have a few different tones showing throughout. This helps give the headboard some great dimension and makes it more visually interesting!
Next, you’ll need to remove the wooden boards from the pallets. A reciprocating saw simply cuts through the nails that hold the pallet boards to the frame. To make things a little easier, you may want to remove the nails from the pallet boards with a hammer and nail punch. Always use extreme caution when taking apart pallets. Wearing protective gloves is a great idea to avoid cuts and splinters when handling any type of wood.
Once you accomplish this, you have your individual wooden pallet boards and you’re ready to begin!
How many pallets does it take to make a queen-size headboard?
On average, headboards for queen-sized beds require about 3-4 headboards. For this DIY project in particular, you’ll need a total of 4. (If you’re a beginner DIY-er, consider securing a few more in case of mistakes!)
How do I know what size headboard I need?
Let’s say you want to make a pallet headboard for a larger or smaller bed. Maybe you recently bought a luxurious king-size mattress, or you’re sprucing up your kids’ rooms with matching headboards for their brand-new twin beds.
You can always adjust this DIY tutorial for your own needs. Simply adjust the number of pallets and boards you’d use for the frame according to your size needs. Here are the typical dimensions of headboards for the most common bed sizes:
Twin-Sized Bed Headboard Length: 41 inches
Full Bed Headboard Length: 56 inches
Queen-Sized Bed Headboard Length: 62 inches
King-Sized Bed Headboard Length: 80 inches
Check out this comprehensive Headboard Sizes Chart and Dimensions Guide from Amerisleep for more info!
Related: How to Store a Mattress (And How Not to Store One)
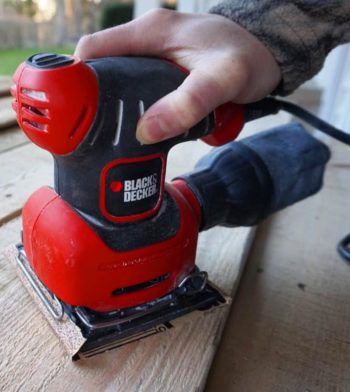
Step 2: Sand Down the Boards
Since this DIY pallet headboard will be close to your bed (and your skin), you want to make sure the edges are rounded, and the wood isn’t too coarse. (Who wants to wake up to a splinter in the middle of the night?) To achieve this, you’ll need to sand it down with sandpaper.
When using sandpaper, it’s important to remember that the lower the number or grain, the rougher it is. I went with 60-grain, which was the perfect smoothness for this project.
Attach the sandpaper to the sander and sand down the boards until they’re at a desired smoothness. Make sure you also sand the edges so that the corners aren’t too sharp.

Step 3: Paint the Pallet Boards Your Desired Color

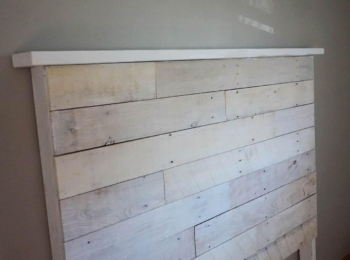
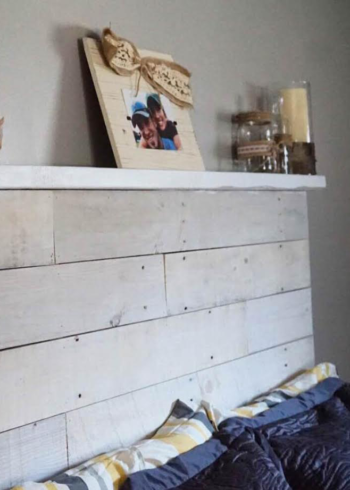
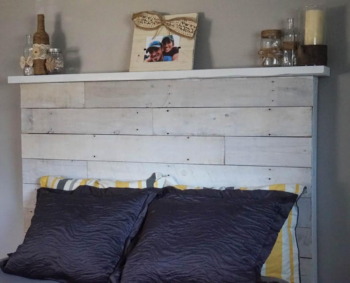
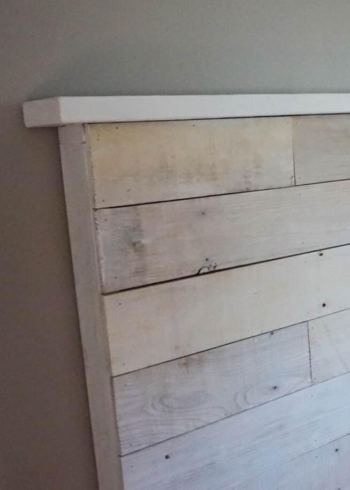
Once your pallets are at your desired smoothness, it’s time to paint them the color of your choice. Since my master bedroom walls are gray, I used a whitewash theme to make my headboard pop. Whitewashing gives the overall look of white but also has a rustic, vintage feel since the natural wood grain still shows through.
To achieve the whitewash look, you need one part paint to two parts water. The more water you add, the more natural the look will be.
Mix the paint and water together and run the whitewash mix over the pallets with a paintbrush. Let this dry overnight.
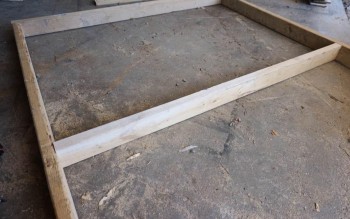
Step 4: Make the Frame for the Headboard
Making the frame for your DIY pallet headboard is a key step because this will be the entire foundation for the project. Eventually, your pallet boards will attach to the frame, so it’s important that it’s sturdy right from the get-go.
- First, measure the height and width of your bed to decide on a frame size We went with a frame that was 60 inches tall and 68 inches wide. (Refer to our note above on frame and headboard sizes for more information!)
- Using the miter saw, you’ll need to cut two 2×4 boards to the height of the headboard and two to fit within this width to form a basic frame.
- Form an outer frame with three pieces, and place the bottom piece where you’d like your headboard to end. (Ideally, this should be somewhere around the middle of the bed frame.)
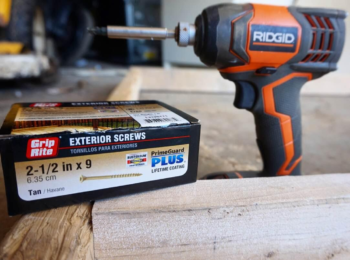
- Attach the boards for the headboard frame together using a drill and exterior screws. Then, you need to measure the rest of your boards to fit within your frame.
- Measure from the top of the frame to the bottom and cut three 2×4 boards to fit those measurements.
- Using screws again, drill the final three interior frame boards so that they are spaced evenly within the frame.

Related: How to Build a DIY Wooden Crate for Extra Storage at Home
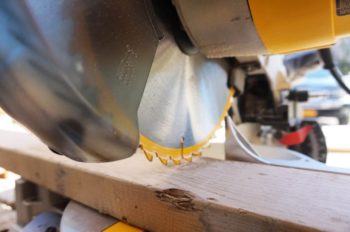
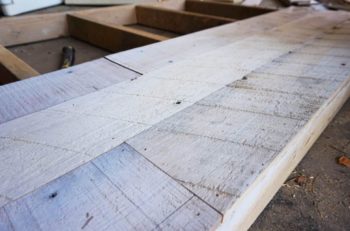
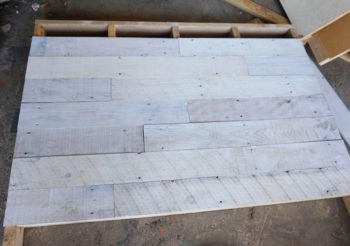
Step 5: Attach the Pallet Boards to the Frame

Once your frame is completed, it’s time to attach your painted pallet boards. First, you have to decide on a pattern and how many boards you’d like to see in each row. This is completely subjective, and there’s no wrong answer! I decided to stick with the pattern of two per row.
Note: You have to measure the pallet boards so that each one will fit within your headboard frame. They must be nailed to the first, second, third, or fourth post of your frame. This helps keep your headboard strong and sturdy. Otherwise, the pallet boards would be nailed to thin air!
Using the miter saw, cut the pallet boards to your chosen length. Use a trim nail gun to secure the pallet boards to the headboard frame (in all three places). Feel free to be generous with the nails. They are so tiny you can barely see them, so they shouldn’t detract from your desired aesthetic. (You can always paint over them if they do bother you, though!)
Tip of advice: While I created my pattern on the headboard, I had tons of smaller pieces left over, but I nearly ran out of long pallet boards to use. It would be a great idea to have a few extra painted boards on hand during this step, in case you need longer ones to cut down.
Step 6: Add Finishing Touches to Your DIY Pallet Headboard
Now that the headboard is completely assembled, it’s time to add some personality. The great part about this DIY tutorial is that you can add just about any embellishments you’d like— from hand-painted patterns to accessories that pull the room together.
Here are a few simple ideas to get your creative juices flowing:
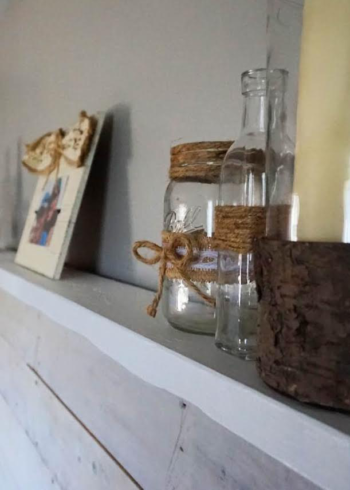
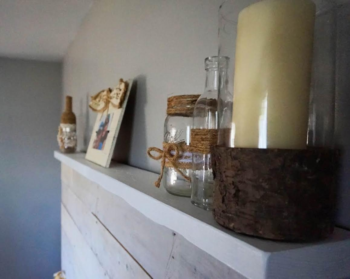
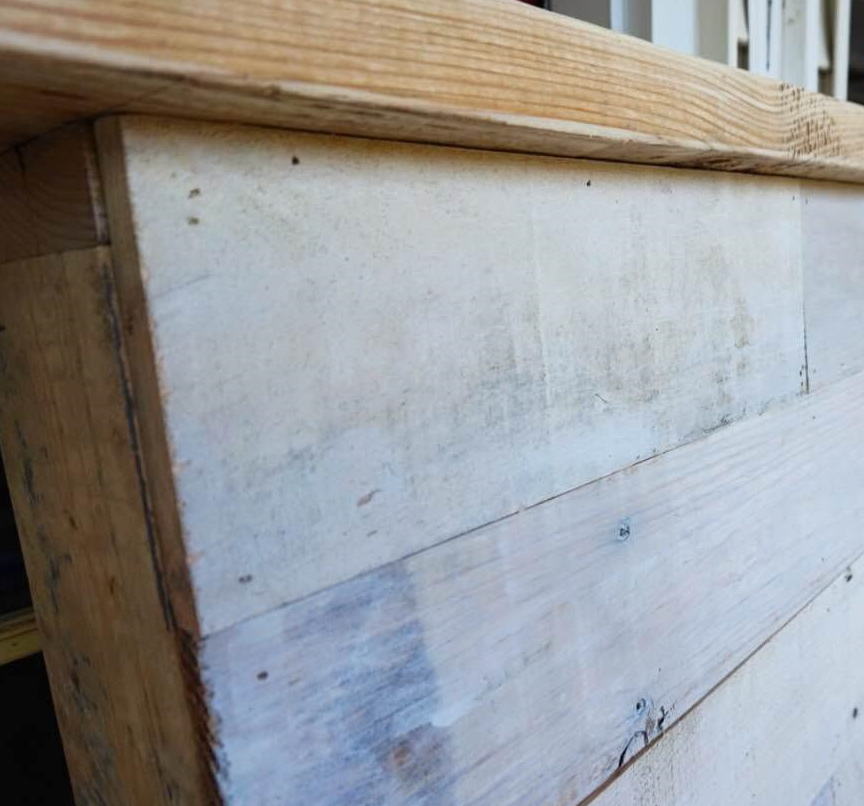
Add a shelf to your DIY headboard: Personally, I chose to add a shelf on the top of my headboard to complete the look. Using a 2×6 board, center the board over your existing frame so that it hangs off two inches on both sides. Mount the shelf and drill the board to the top of the frame. Next, paint the shelf and exterior frame using the same white paint as before (or whichever paint you wish). This helps the shelf to stand out from the rest of the headboard. Once your pallet headboard is dry, you’re all set to carry it in your bedroom (with some helping hands, of course) to add finishing touches like books, vases, and photo frames.
Top off your pallet headboard with lights: Fairy lights are one of the best cost-effective ways to create ambiance in any room— especially in the bedroom. Grab some of your favorite string lights (bonus points if they’re a fun shape), and string them along the top of your headboard. Reading, gaming, watching TV, or simply relaxing before bed just got a bit more fun!
Use paint to make a chalkboard headboard: Typical chalk paint comes in many colors and is best known for creating a matte, chalky appearance. But did you know you can also use chalkboard paint for some unexpected fun around your house? Perfect for kids’ bedrooms and playrooms, chalkboard paint can be purchased at just about any hardware store or online.
How Will You Make a Simple Pallet Headboard?
Making your pallet headboard may take a few hours of work, but it’s certainly a fun, cost-effective way to add natural decor to your primary bedroom. Have you tackled this DIY project? We’d love to see your final product! Feel free to share helpful tips and photos of your creation with us on social media.
Editor’s Note: Originally published on April 25th, 2016; updated on July 5th, 2023.
Tackle These DIY Projects Next:
- Under Bed Storage DIY: How to Make Your Own
- How to Make a DIY Garage Pegboard for Easy Tool Organization
- 10 Easy Curb Appeal Ideas You Can Do On Your Own