When it comes to organizational hacks that are practical, yet fun, pegboards are all the rage right now. From bathrooms and home offices to all of the little nooks and crannies that give your home its unique personality, an organizational pegboard can spice up just about any space— and look great doing it.
A garage may seem like the obvious place for extra clutter to land in your home. Especially if you’re an avid DIYer, you already know just how quickly your tools, leftover materials, and miscellaneous accessories can pile up. That’s why if you’re looking for a simple storage and organization system to house all of these items, creating your own pegboard wall is a fantastic option. There are so many options for how to customize a DIY garage pegboard to fit the items you need to organize the most. What’s even better? You can continually change up the layout of your pegboard storage wall to suit your ever-changing organizational needs and cater to whatever creative DIY projects you’re cooking up.
Related: The Ultimate Guide to Home Organization
How do you make a pegboard tool holder?
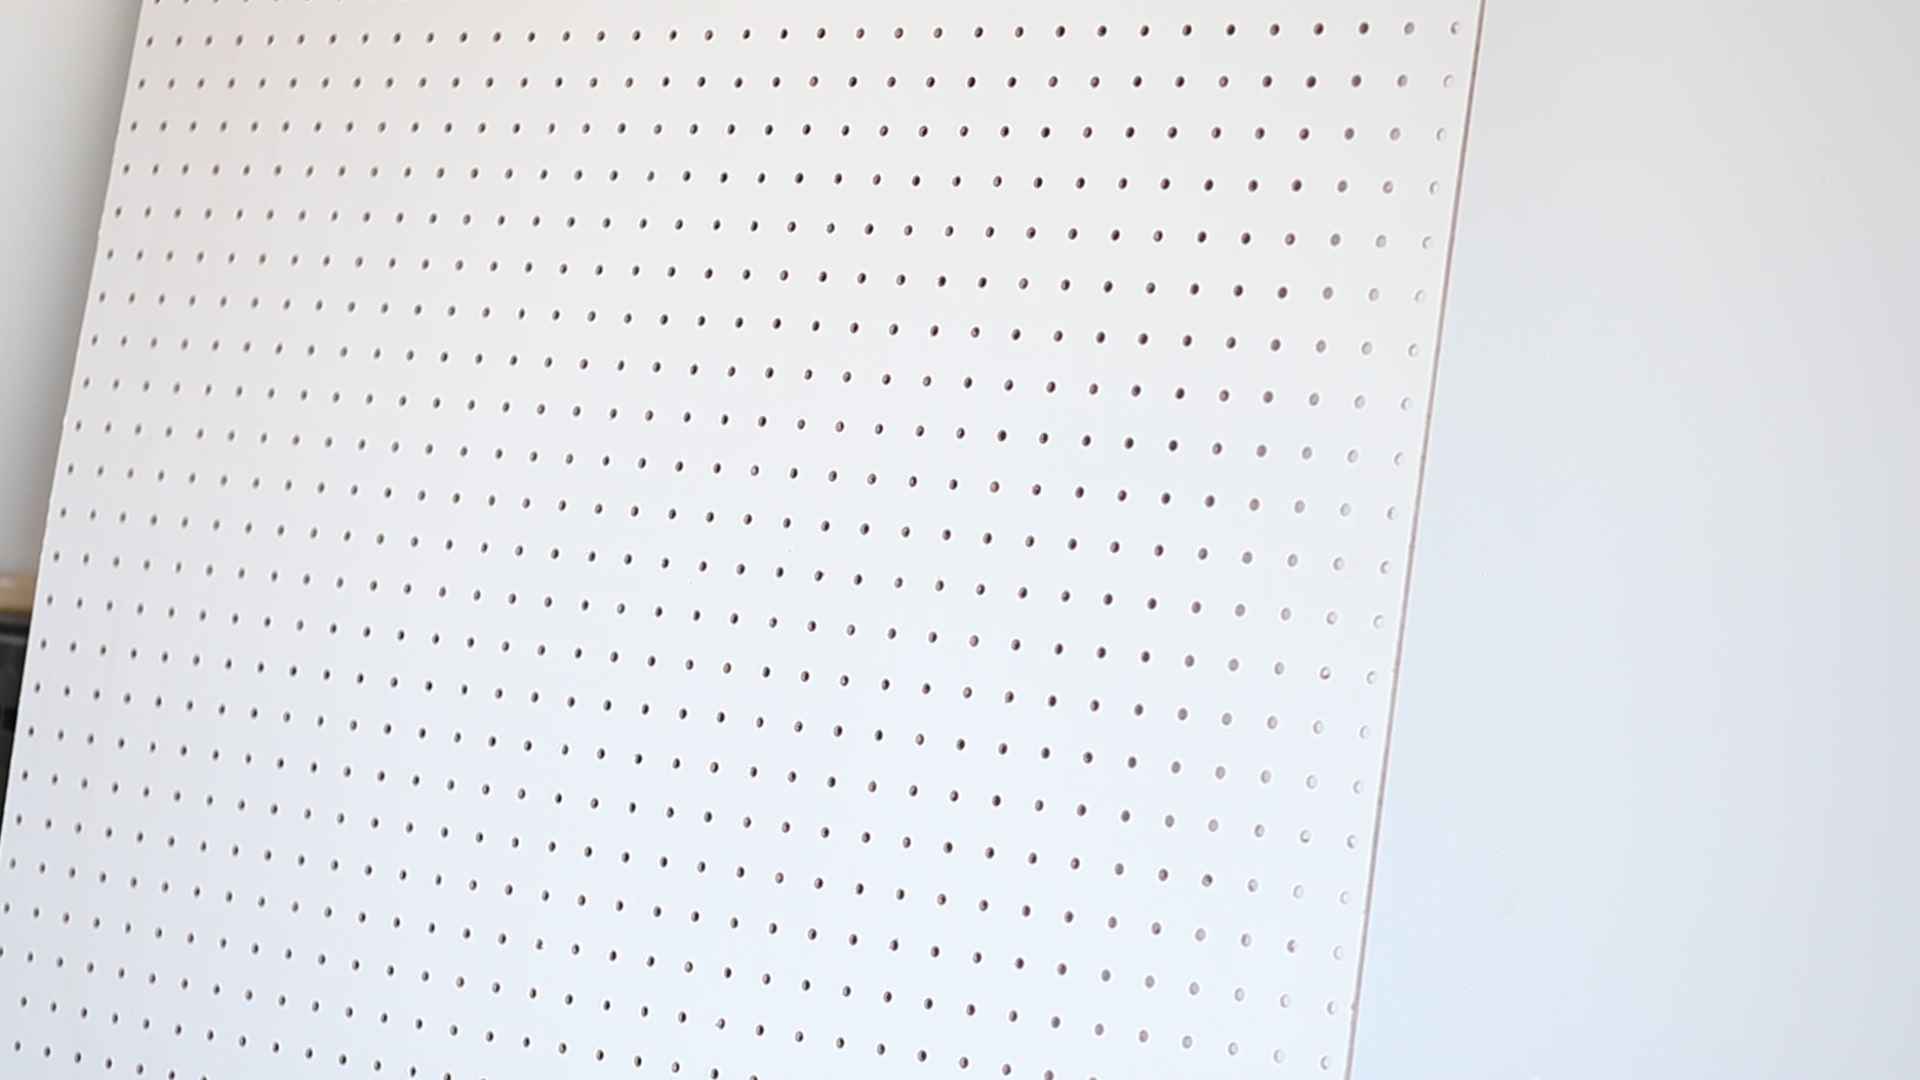
Ready to jump into the DIY? Before we begin, you might be wondering: Where exactly can you purchase a pegboard? And what accessories are the best for setting up a pegboard storage wall? Big box retail stores like Target, Amazon, and Walmart all offer smaller pegboard options if you’re looking for a more traditional, bulletin board-sized pegboard. These work great for above-the-desk areas, home offices, and even smaller mudrooms and entryways that need sprucing up. But if you’re looking for a larger-scale pegboard wall that’s ideal for storing tools in the garage, you’ll need something bigger than that. At your local hardware store, you should be able to purchase a premade pegboard sheet and have it cut to size on the spot. Be sure to grab any necessary measurements before you go, and have the means to get it home. Full-size pegboards are huge and likely will only fit in your vehicle if it’s a truck.
Learn How to Make a Garage Pegboard: A DIY Tutorial
Here’s what you’ll need to craft your organizational garage pegboard:
Materials
- One pegboard sheet
- Three pieces of 1″x 2″ board (cut three inches shorter than the width of your board)
- Wood screws
- Pegboard accessories
- Level
- Drill
- Stud finder
Before You Get Started: Gather Your DIY Materials & Pegboard Accessories
Visit your local hardware store and purchase your supplies. Have your pegboard and 1″ x 2″ board cut down to size at the store, or use a miter saw at home to cut it yourself. (If you have the means and experience required, of course.) Take inventory of any tools, crafting materials, knick-knacks, and anything else you’re currently storing in the garage that you want to organize before heading to the hardware store. That way, you’ll know how big of a pegboard you’ll need to purchase.
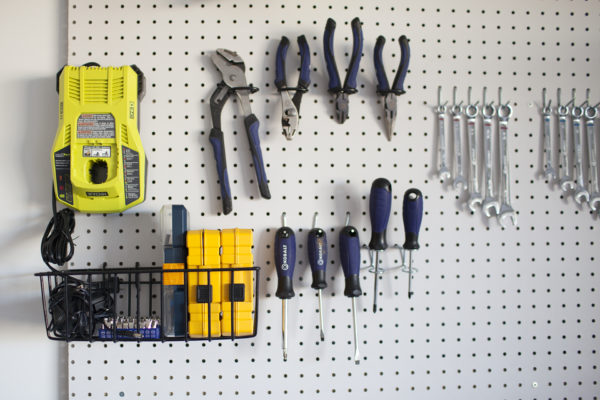
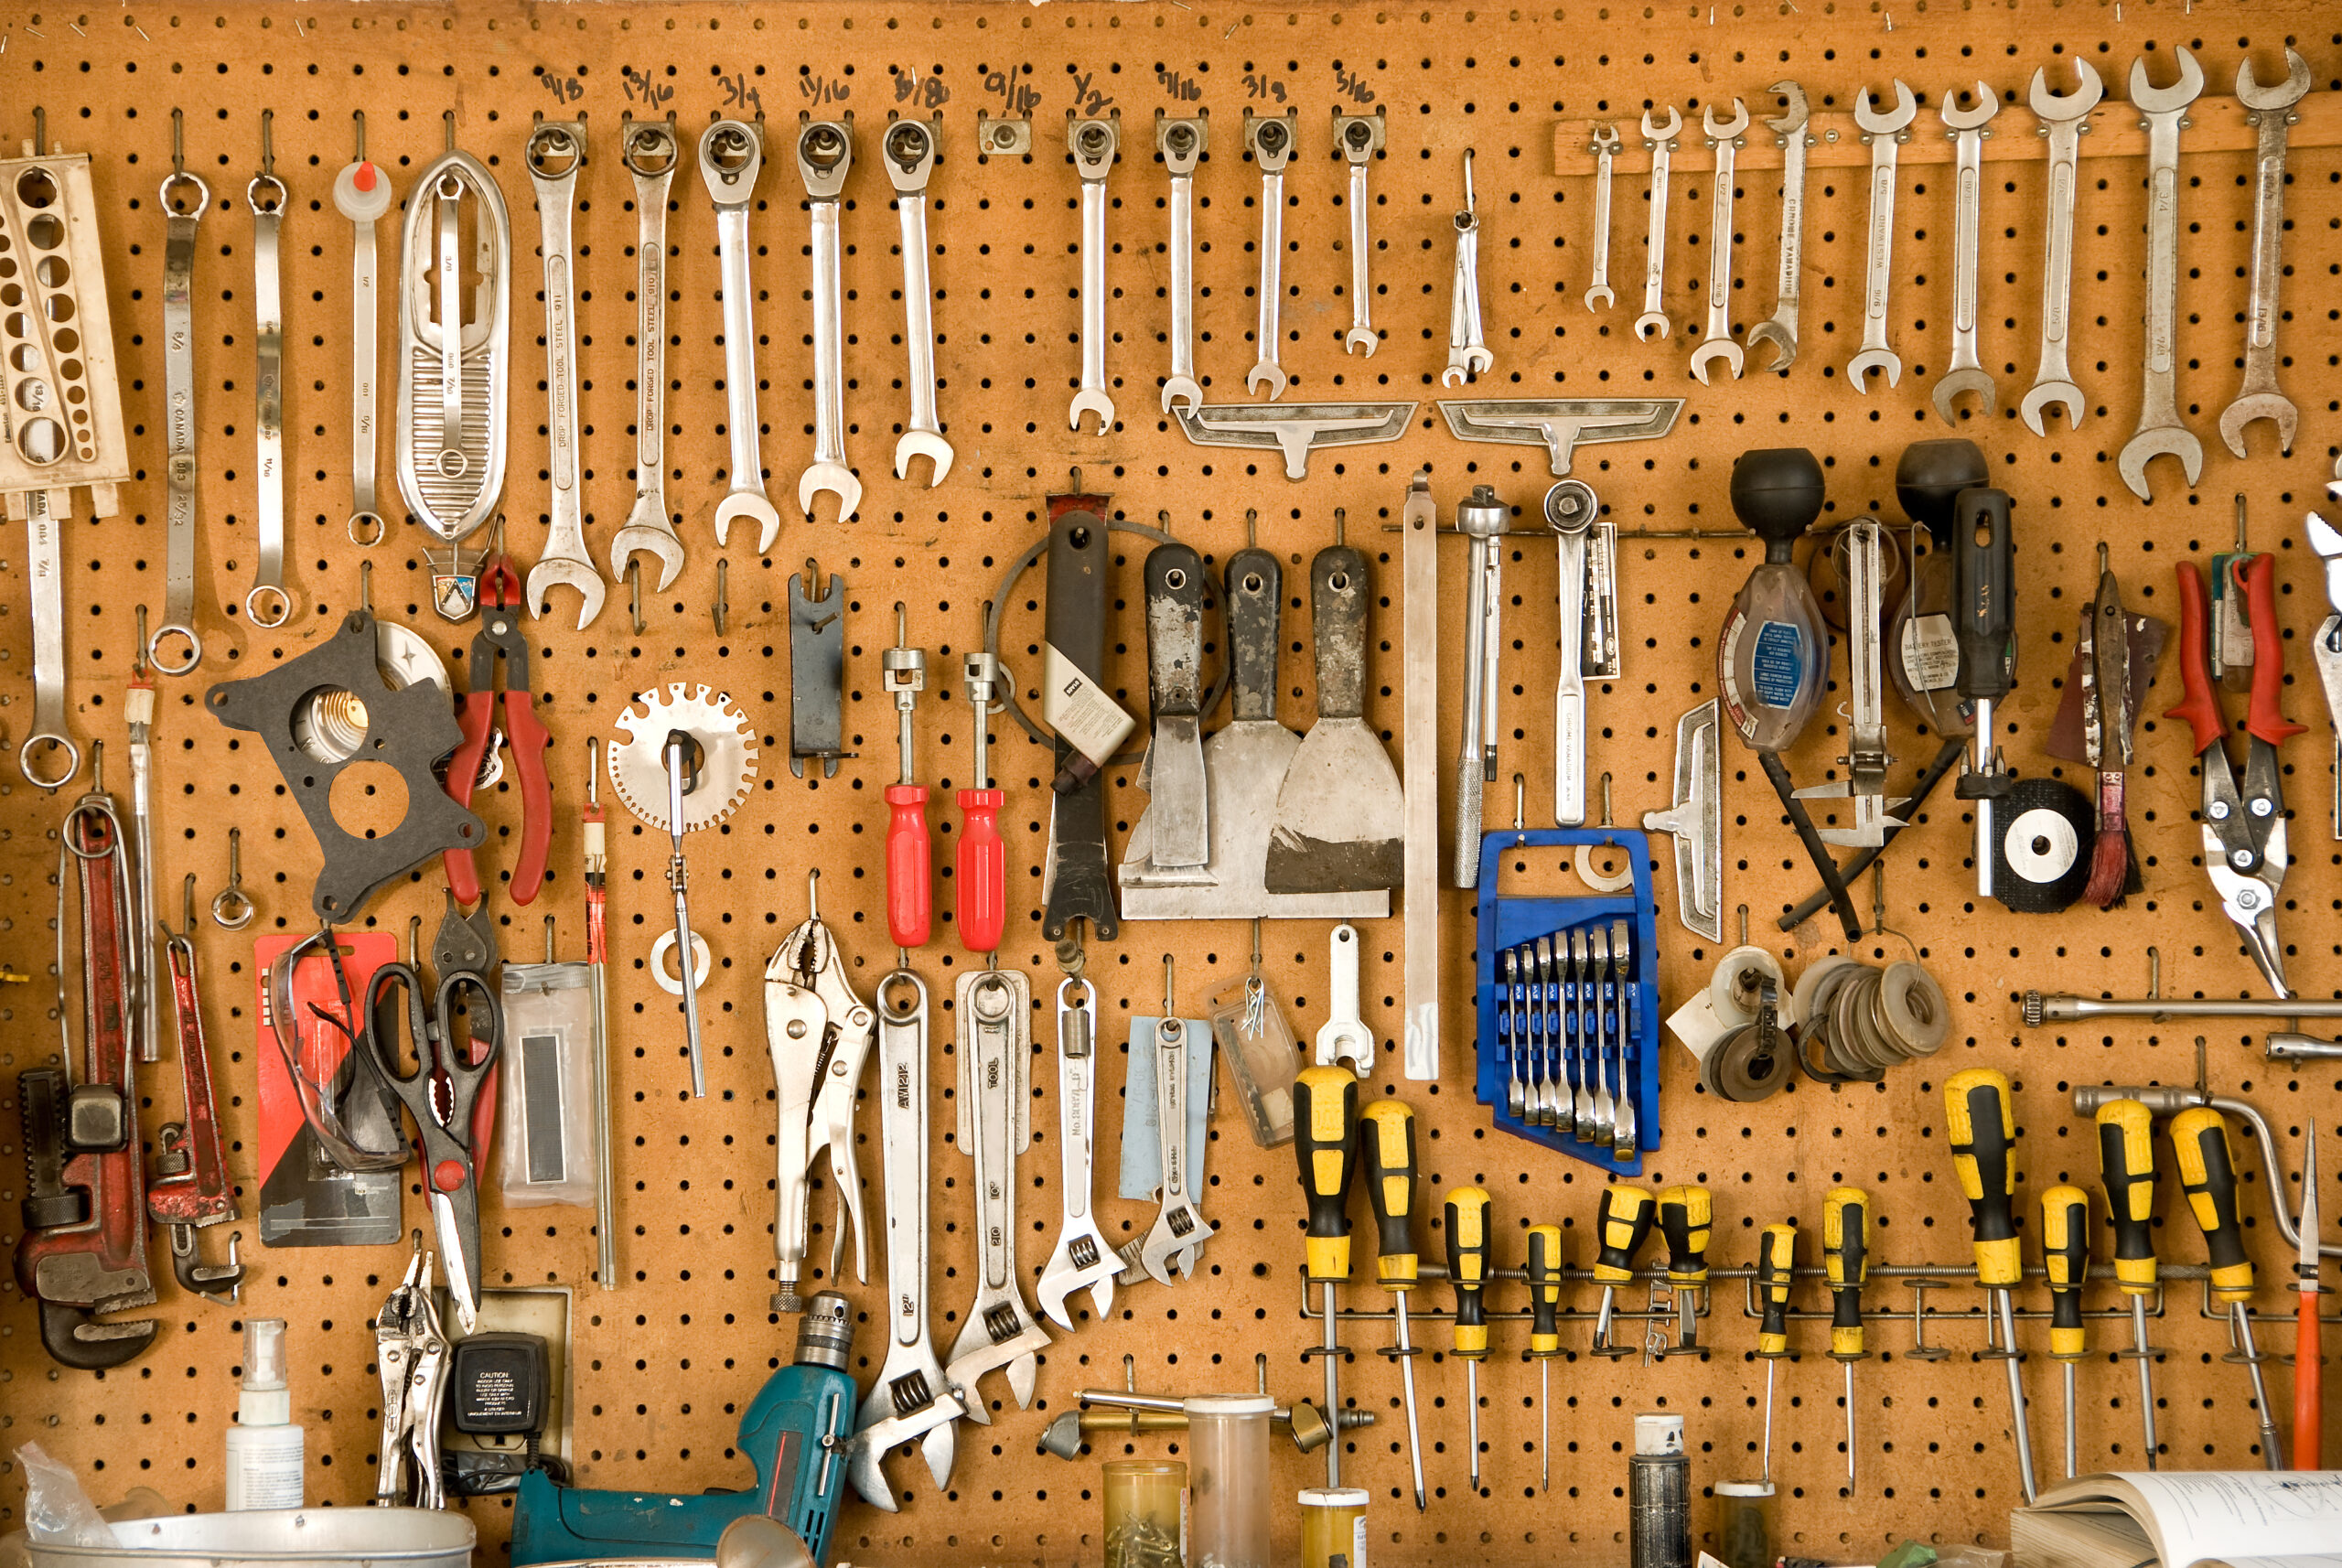
For pegboard accessories, I’ve found that Home Depot has a vast assortment of supplies. Plastic pegboard bins, wire baskets, simple pegs, functional pen cups, and even hidden drawers are all popular accessories you can use to deck out your garage pegboard. But don’t stress out about any of these extras just yet. You can grab any organizational tools that speak to you; just remember that the best part about a pegboard is it can be an ongoing organization project. So don’t feel like you have to know 100% of what you want to get the first time you go to the store. Build the pegboard, and you can always add accessories in the future to it to organize more tools.
Related: How To Make Your Home Feel Less Cluttered
How to Install & Hang a Garage Pegboard
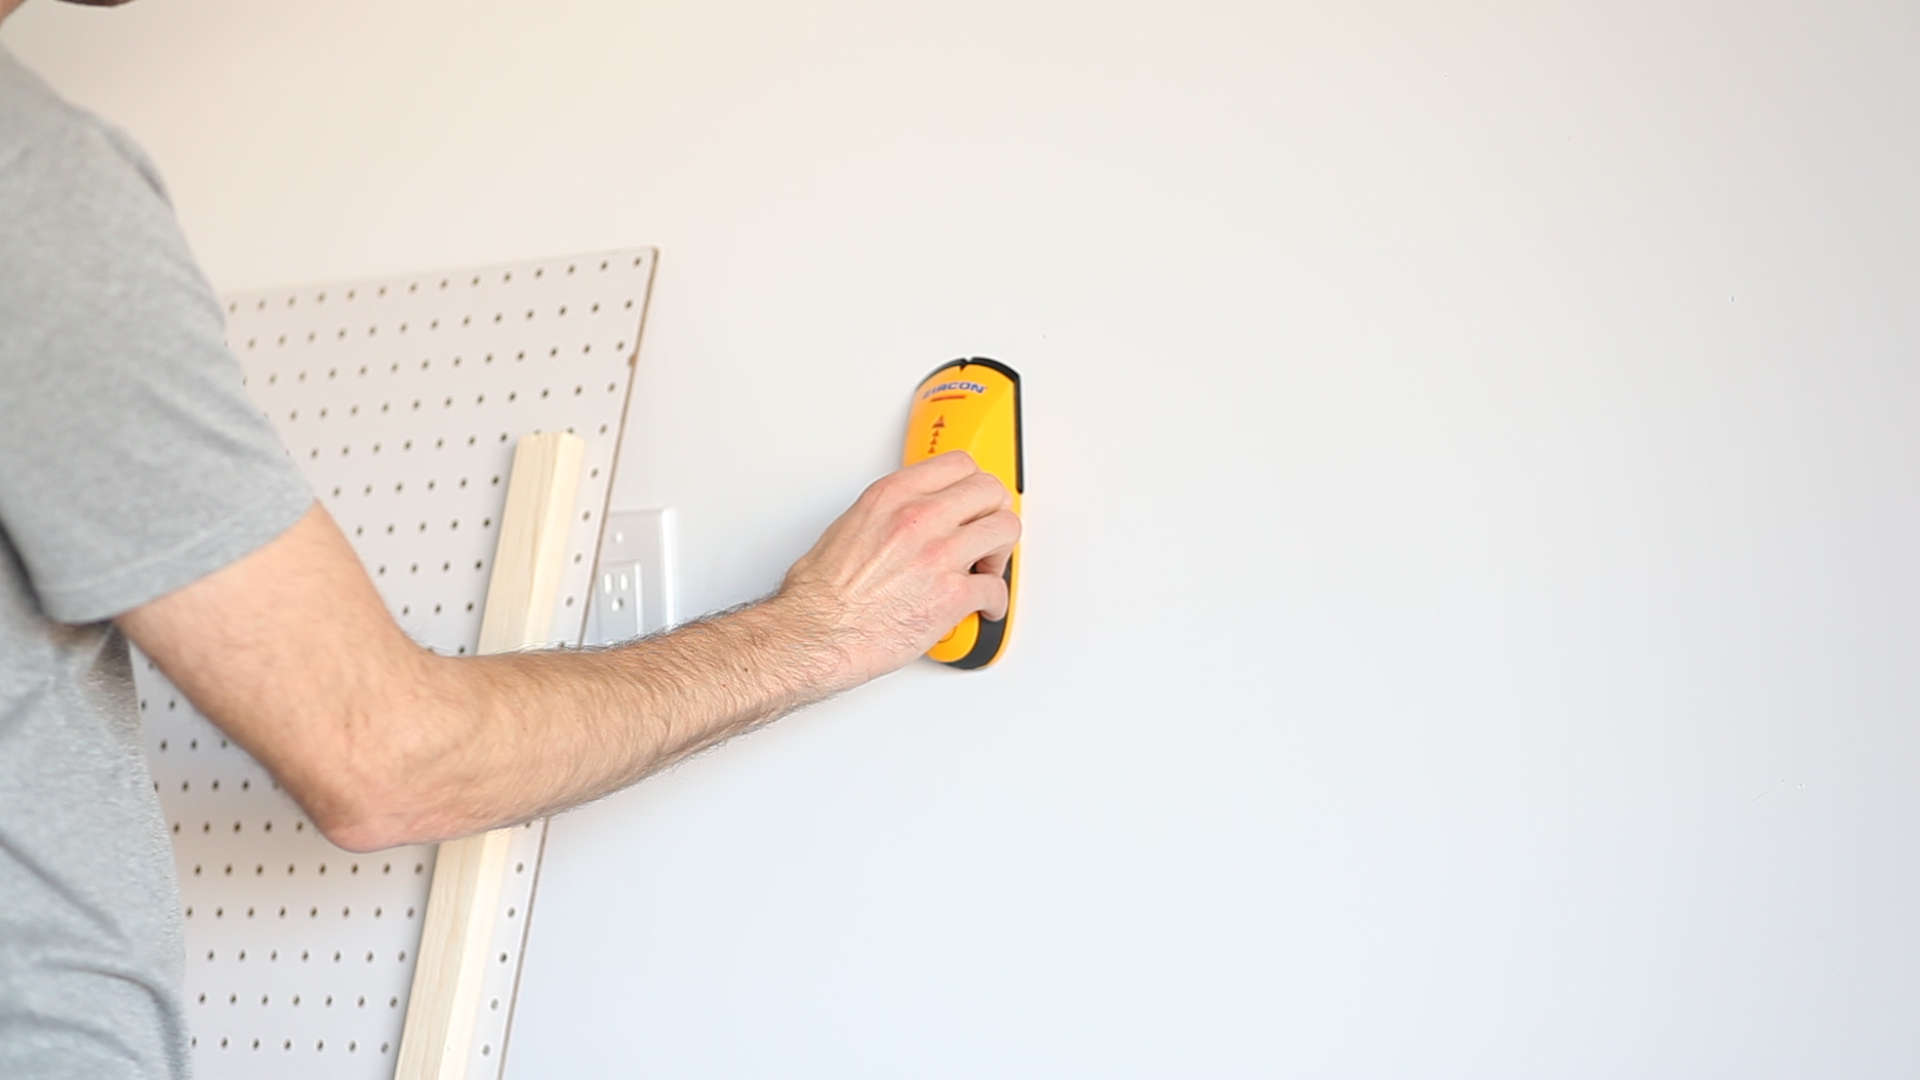
Step 1: Find and Mark Studs
Use a stud finder to find where the studs are on your garage wall. Mark with a pencil or pen in the general area where you will have your top frame board installed.
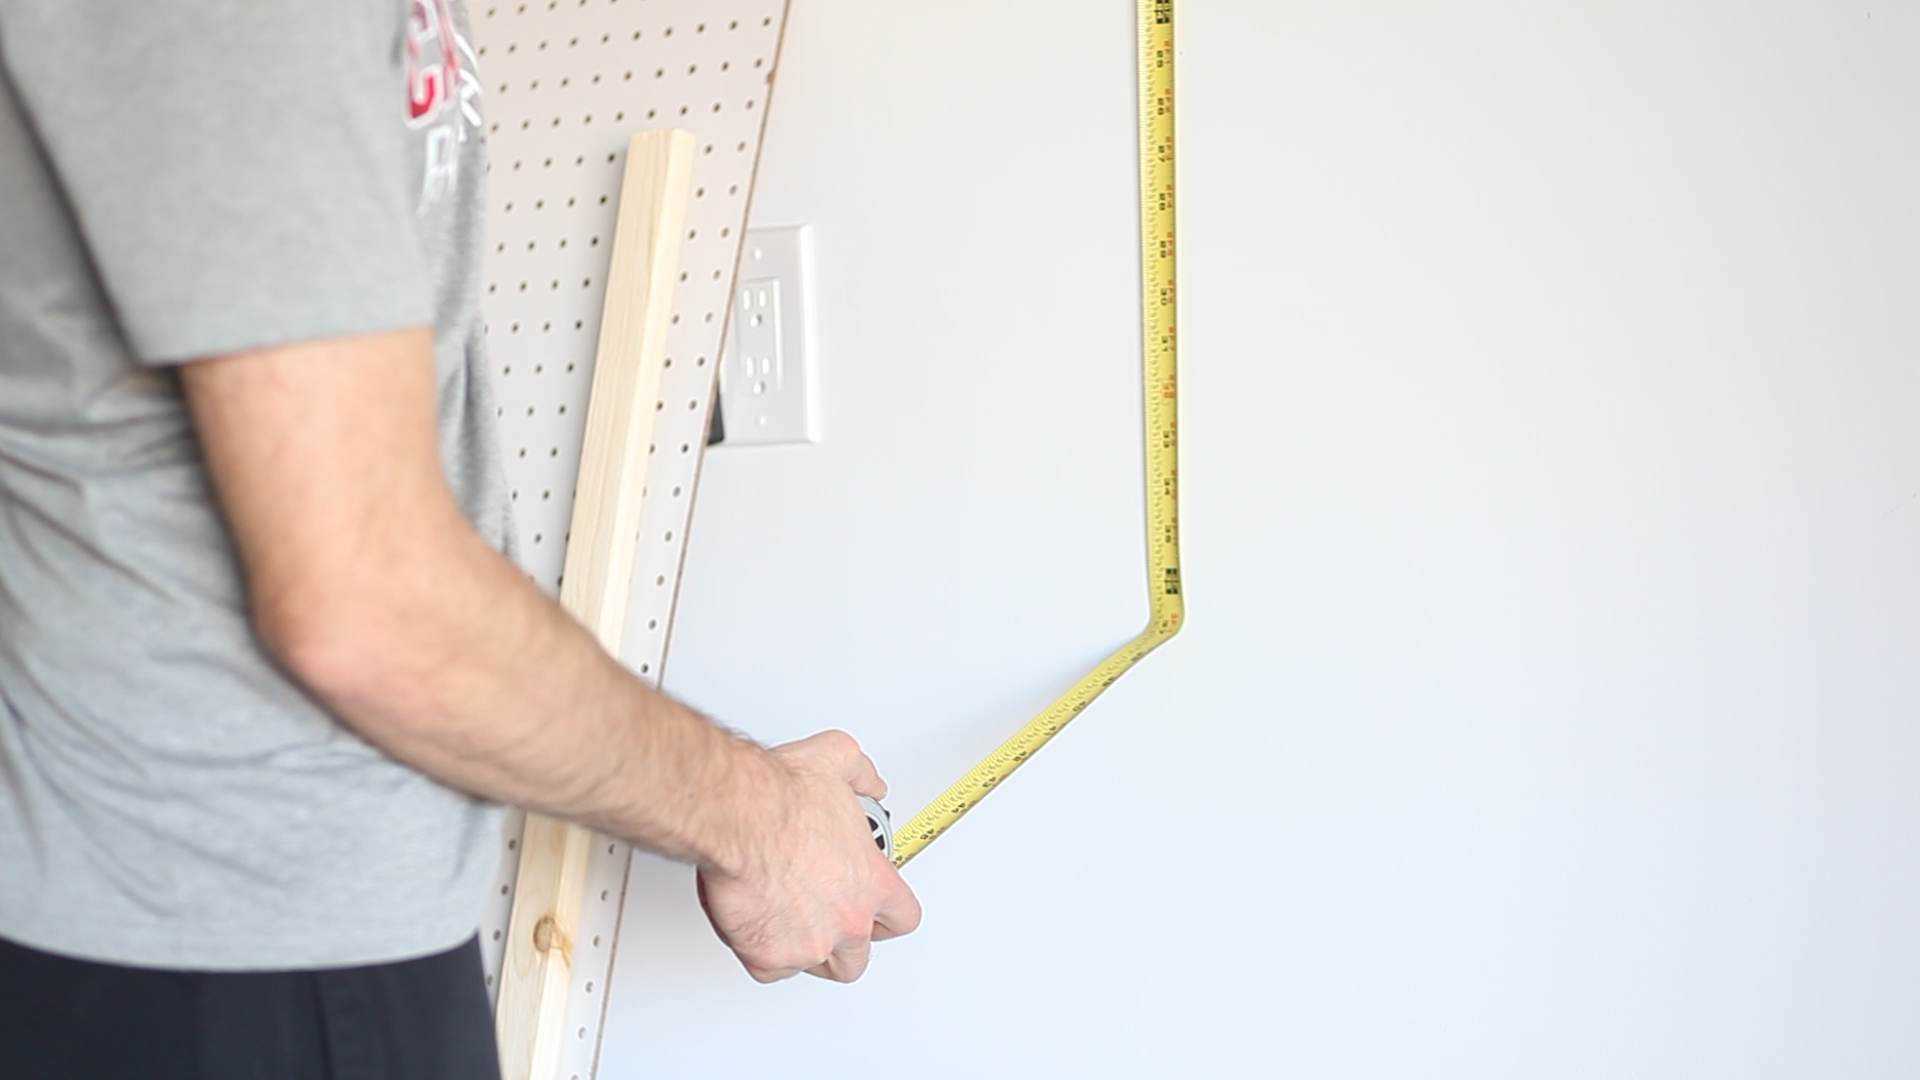
Step 2: Measure Space for the Pegboard on Your Wall
Mark on the wall where you want the top of the board to be. Be sure to remember that your frame boards are shorter than your pegboard.
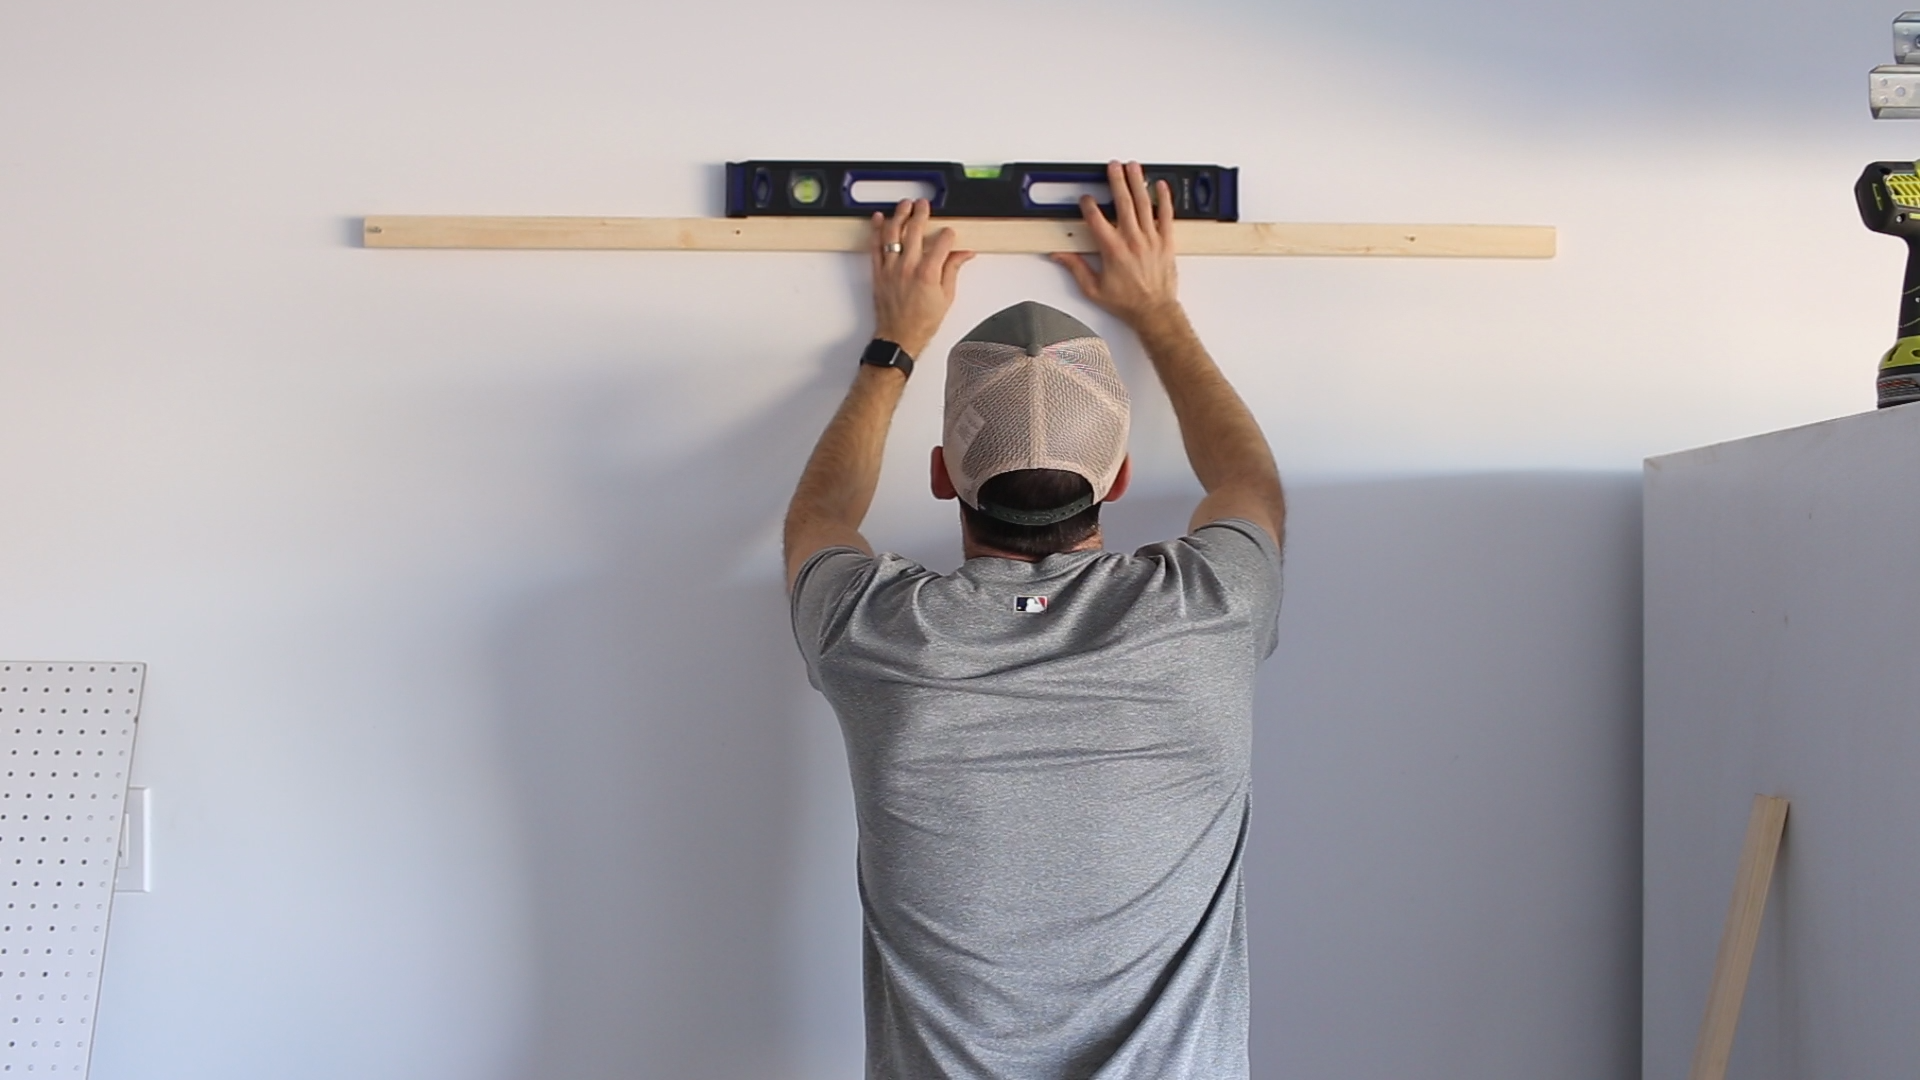
Step 3: Pre-drill Holes Through the Frame Boards and Wall
Pre-drill three holes horizontally along the 1″x 2″ pieces drilling into a stud in the wall, starting with the top board. Make sure your piece is level after drilling the first hole and securing with a screw. Then continue with the next two screws to secure the board (right side first then middle).
Related: How to Build DIY Garage Storage Shelves for Under $60
Step 4: Measure and Mark Space for the Bottom Frame Board
Repeat step three for the bottom board, making sure it is lined up with the top board as well as level. Measure and mark space first, then pre-drill through the board, and finally secure with wood screws.
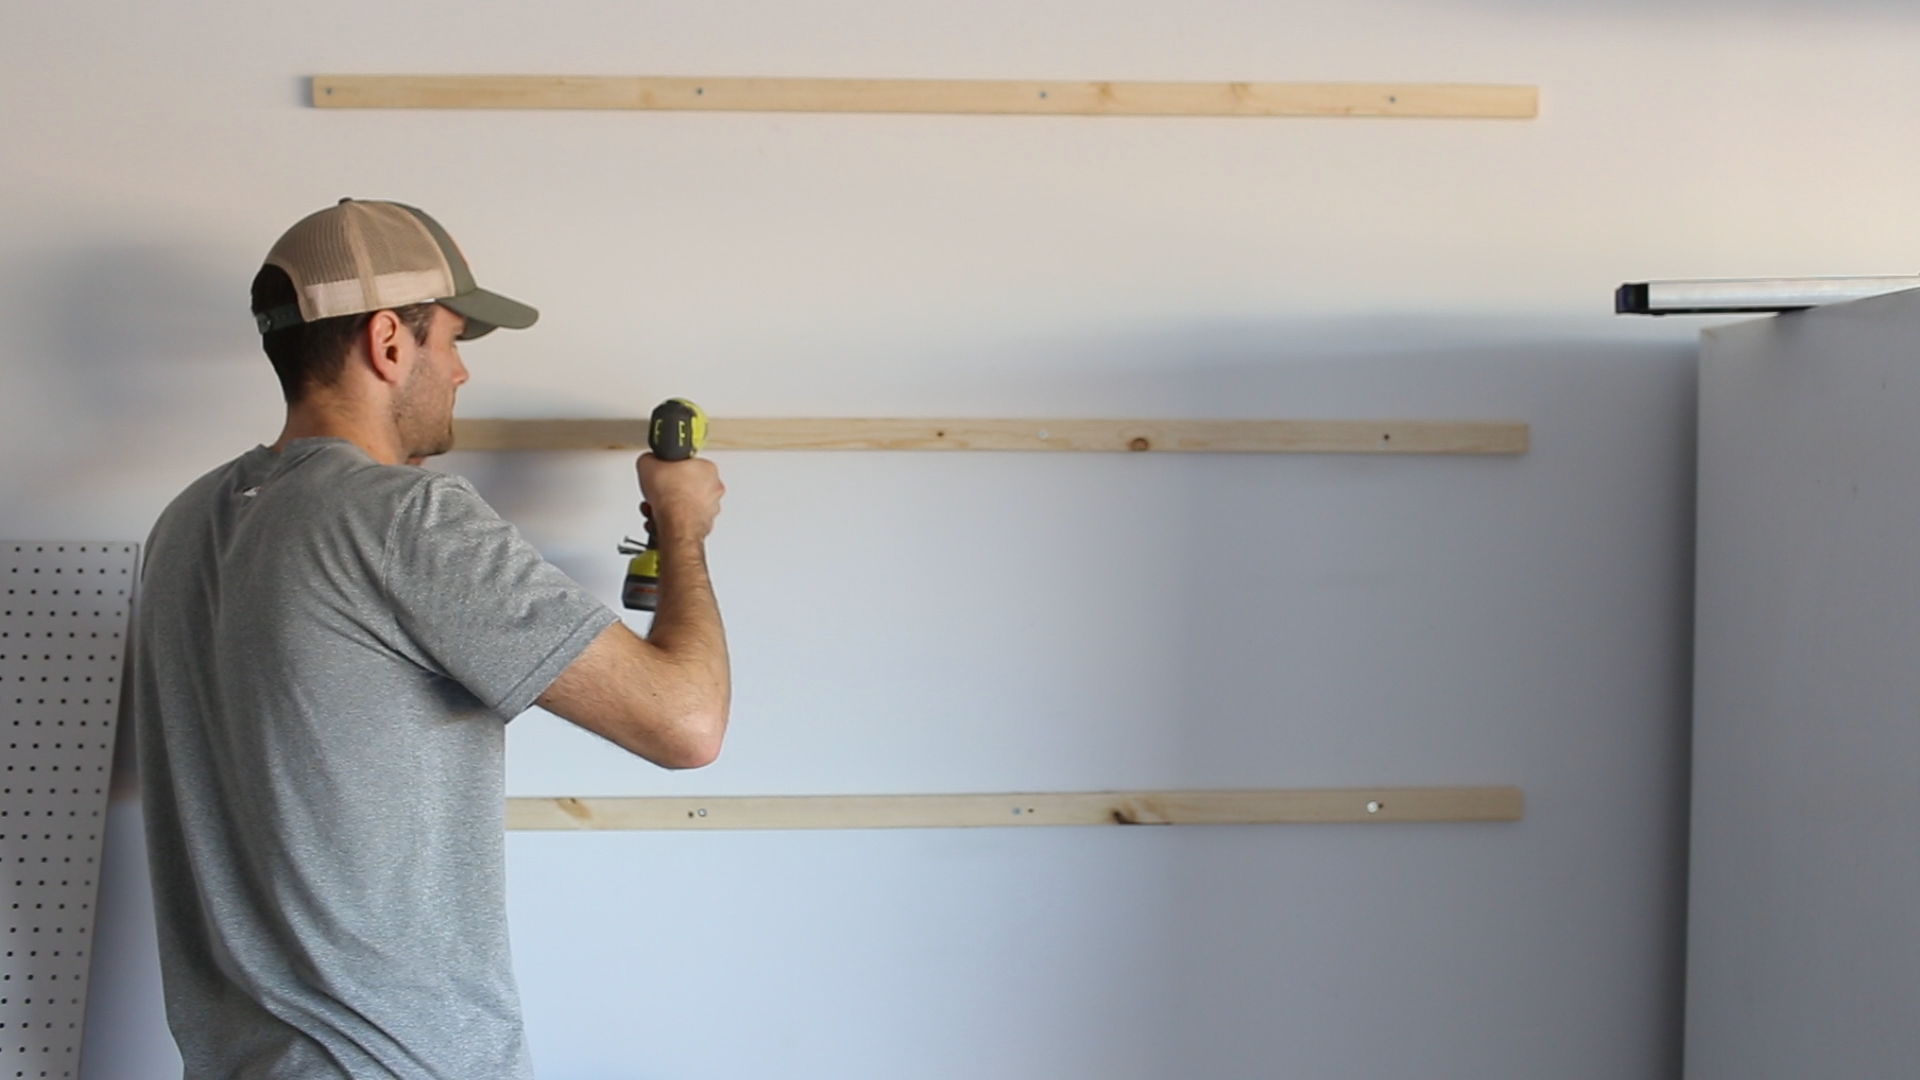
Step 5: Repeat for the Middle Board
The middle piece can be eye balled for where the middle is, just be sure it lines up with the other two and is level.
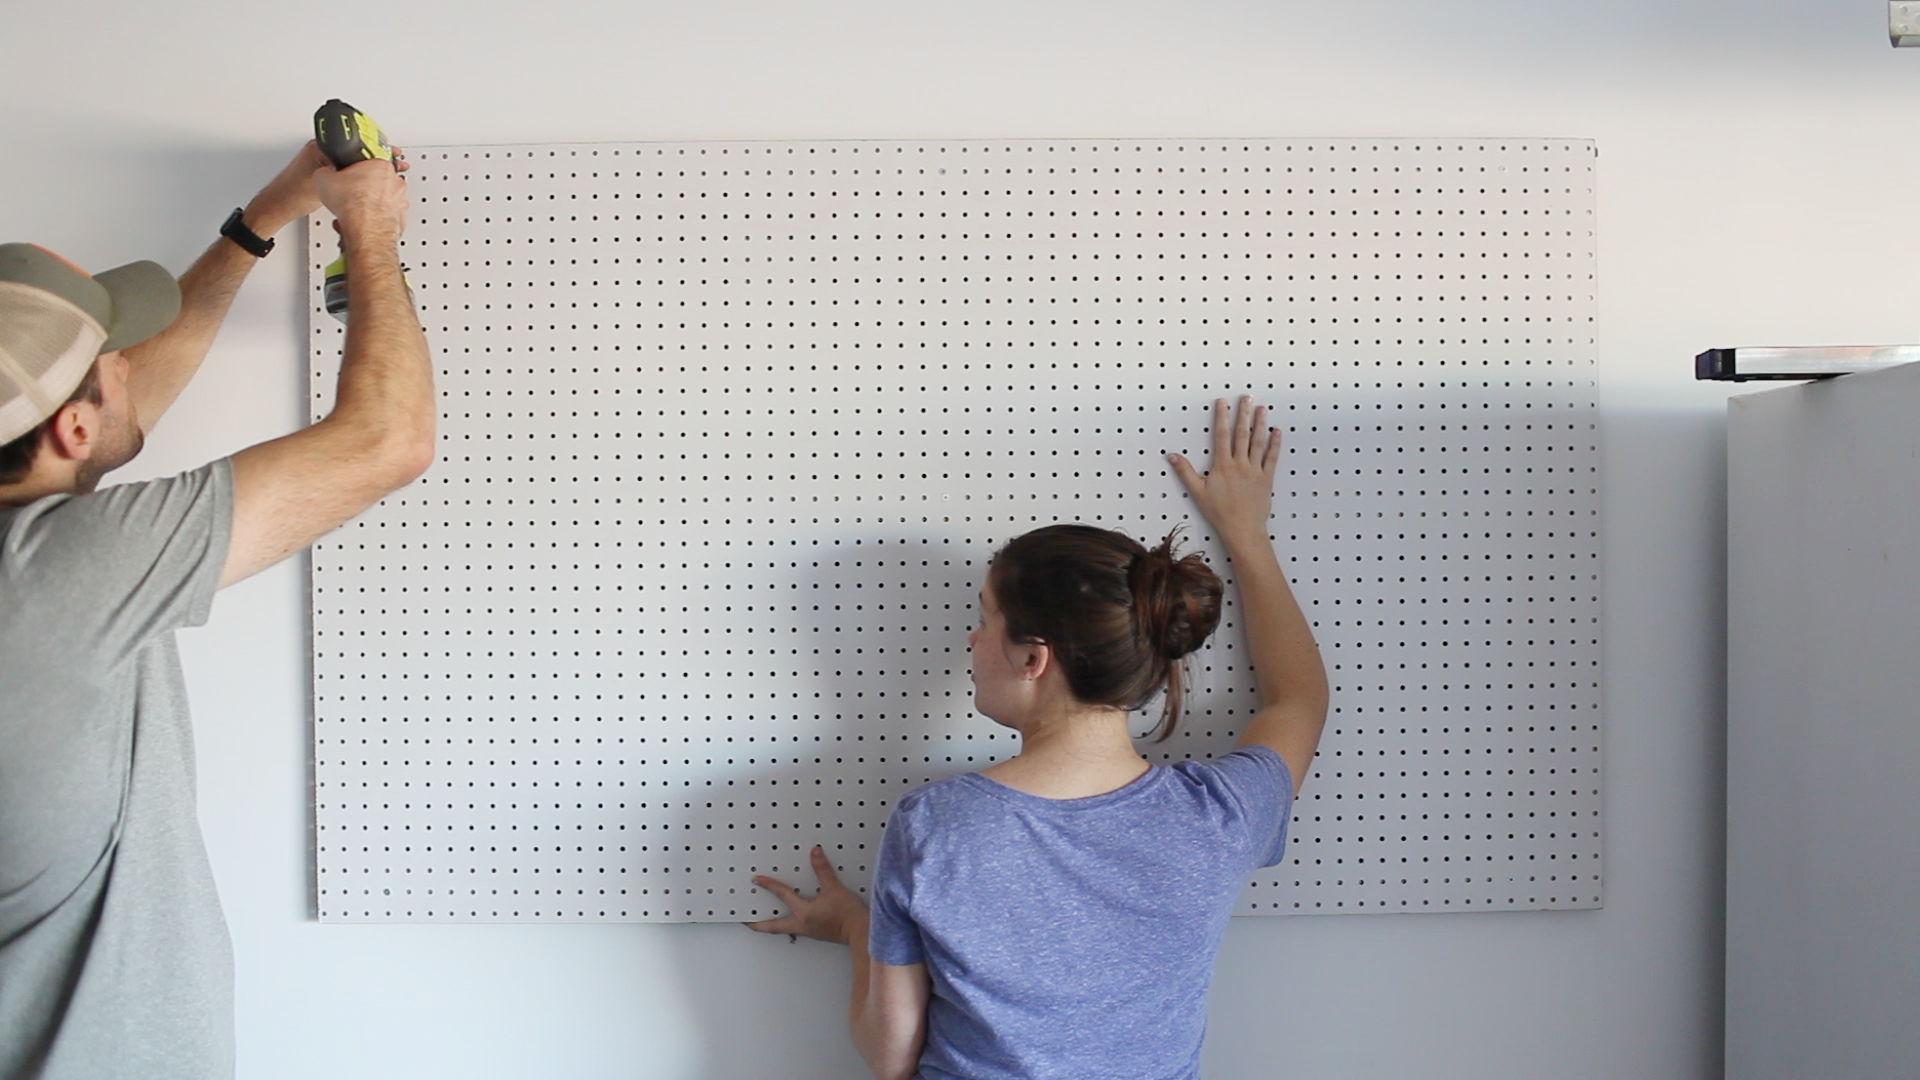
Step 6: Mount the Pegboard to the Frame Boards
If you have a large pegboard sheet that spans the entirety of your wall, you may need an extra hand for this step. Lift your pegboard into place, remembering to center the board along the frame boards that are shorter than the pegboard. You also want to watch where your pegboard holes line up on the frame boards. For the most secure hold, you’ll want them to be relatively centered on the boards. You can secure your pegboard by pre-drilling it into the wood frames and then securing it with wood screws to the boards.
Step 7: Customize Your Pegboard With Accessories and Tools!
Hang your pegboard accessories and storage compartments, organizing your tools and materials as you go. Not a fan of how it’s turning out? Simply unhook each compartment and move them to a new location on the pegboard. That’s the beauty of pegboard organization!

Related: How to Organize Your Garage Before Winter
What is the best way to organize tools on a pegboard?
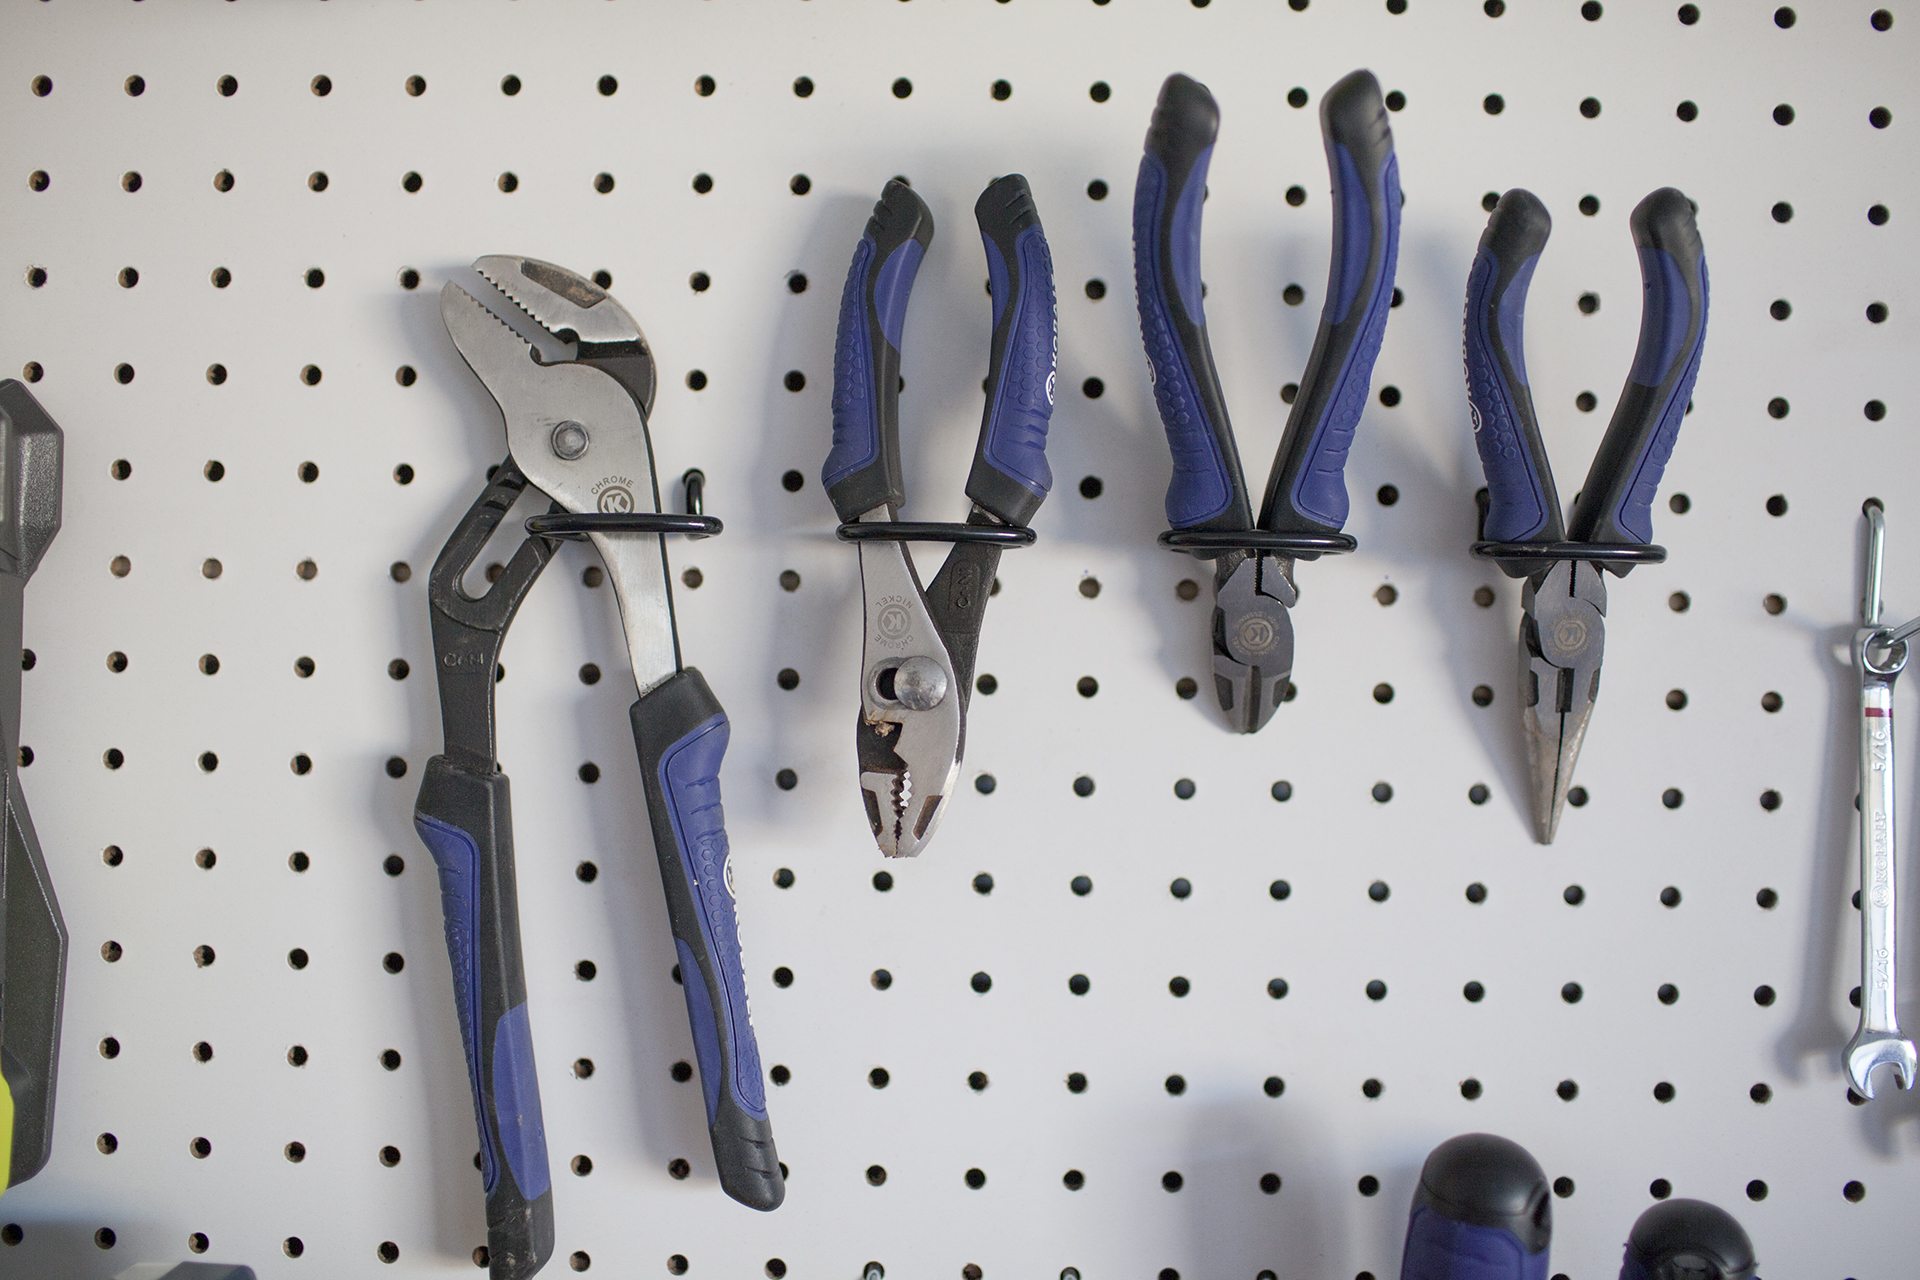
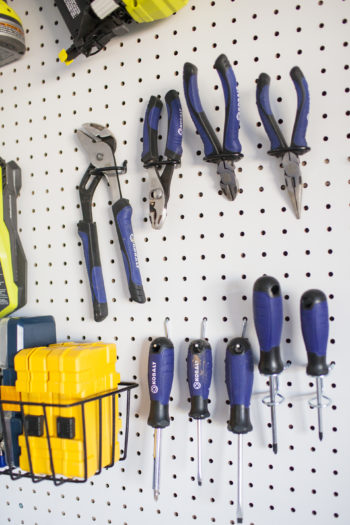
How you decide to set up and organize your garage pegboard is entirely up to your personal needs. A few questions to ask yourself could be: How will you integrate your new pegboard wall into your everyday life and creative projects? Will it serve as a catch-all storage area for tools you rarely use? Or will your pegboard wall house items you’re actively using around the house or need to keep accessible for DIY projects? Your answers could change the way you approach pegboard organization. In general, it’s a good idea to group similar tools together when organizing them on a pegboard. Sort all of your items by function and/or shape to assess what you’re working with. Then, corral them all using pegboard storage bins or hang them on their designated hooks. If you are using your pegboard tool wall on an everyday basis, keep the tools you use the most at eye level or at least within easy reach.
How do you style a pegboard tool organizer?
When you first purchase your garage pegboard wall from the hardware store, chances are it’ll be a plain beige or wood color. If that sort of simplicity suits your style and vibe, feel free to run with it. But if you’re looking for the best ways to make a pegboard pretty, it’s time to get creative. When styling your pegboard, don’t shy away from color. This could be in the accessories you purchase for your pegboard or the boards themselves. Painting your pegboard is a super easy way to liven up any space and add a fun and colorful element to your garage, an otherwise drab, dreary, and colorless area. You can opt for your favorite solid paint color or use it as a blank canvas for a DIY mural— the possibilities are endless! Here are a few other garage pegboard ideas we love to give you some creative inspiration:
- 7 Unexpected Ways to Decorate With Pegboard
- 25 Brilliant Pegboard Ideas to Organize Every Room
- 6 Clever Ways to Use Pegboard in Any Space
Related: 18 Storage Shed Organization Ideas You Need to Try
Keep Your Tools Handy & Organized With These Garage Pegboard Ideas
Watch this tutorial video below for an in-depth visual of how to make and install your own garage pegboard. Have you tried this DIY tutorial? Feel free to share your pegboard creations with us on social media!

Update: This post was originally published on February 12, 2018 by Madison Wetherill. It was revised on May 3rd, 2020, with new information from Molli Spear, and was revised again on March 16th, 2023 with further information from Emily Malkowski.